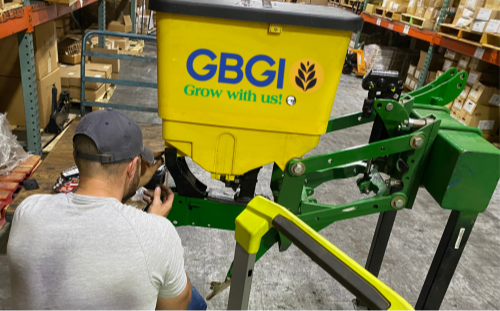
5 Steps to Prepare Your Planter for Spring Planting

Spring planting is a critical time for corn and soybean growers, and ensuring your equipment is in top shape before planting season can make the difference between a successful yield and a disappointing season. Proper row-unit maintenance is essential, particularly when it comes to the wear and tear on key components like parallel arms and openers. This article will guide you through five actionable steps to prepare your planter for the season, ensuring precision, durability, and optimal performance.
Step 1: Inspect Row-Unit Components Thoroughly
Parallel arms are vital for maintaining the alignment and depth of the row unit. Worn and loose parallel linkage compromise seed placement.
-
What to Check: Examine parallel arms for play or excessive wear. Worn arms can cause uneven planting depth, reducing yield potential.
Pro Tip: Look for signs of elongation in bolt holes or rust. Try to wiggle your parallel arms back and forth. If there is any side to side play or rattle in the arms they should be replaced.
Step 2: Assess Opener Blades
Opener blades are critical for creating a clean furrow at the correct depth. Dull or worn blades can result in poor seed-to-soil contact.
-
What to Check: Inspect the diameter of opener blades and replace any that are below the manufacturer’s minimum diameter specification. (14.5” for 15” disks)
Pro Tip: Ensure that blade touch points are set to the recommended tolerance (often about 1.5–2 inches of contact).
Step 3: Calibrate Depth Adjustments
Seed depth consistency is one of the most influential factors for achieving uniform emergence.
-
What to Check: Test and adjust row unit depth controls to ensure uniform planting depth across the entire planter.
Pro Tip: Use a depth gauge to confirm each row unit is set to the same planting depth across the planter.
Step 4: Tighten and Properly Shim all moving parts
Proper torque reduces wear and tear, extending the lifespan of components and improving performance.
-
What to Check: Gauge wheel arms and disk openers should be shimmed each season if the gauge wheel tires and disks have worn to ensure proper tire to blade contact and correct touch width on disks.
Pro Tip: Spin gauge wheel tires before season to ensure proper contact with disk blades. If there is little to no contact, adjust shims/bushings.
Step 5: Test Planter in the Field
A pre-season field test ensures that all adjustments and repairs translate into accurate planting and helps identify remaining issues before planting begins.
-
What to Check: Conduct a field test to identify any issues with alignment, depth control, or spacing.
Pro Tip: Make a few passes and check seed placement by digging up rows to verify consistency.
Key Takeaway Points
-
Parallel arms are the backbone of row-unit performance; neglecting their maintenance leads to alignment issues and uneven planting.
-
Worn opener blades compromise seed-to-soil contact, reducing emergence rates.
-
Depth control consistency ensures uniform seedling emergence, which is critical for maximizing yield potential.
-
Regular lubrication and tightening of components prevent costly breakdowns during planting.
-
A thorough field test is the final step in ensuring your planter is ready for a successful planting season.
10 FAQs Corn Growers Are Searching for Online
-
"How do I check for wear on planter parallel arms?"
Look for loose or wobbly movement, worn bushings, and elongated bolt holes. GBGI arms are designed to resist these issues longer than others. -
"What happens if opener blades are worn?"
Worn blades result in uneven furrows, reducing seed placement accuracy and yield. Sharp, properly aligned blades create clean furrows, critical for seed placement and soil contact. GBGI openers excel at maintaining sharpness and durability. -
"What’s the best way to maintain planter components during the off-season?"
Store equipment indoors, lubricate moving parts, and inspect regularly for rust or damage. -
"How do I know if my planter is planting at the correct depth?"
Conduct a test run and dig up seeds to measure depth consistency. -
"What is the recommended diameter for replacing opener blades?"
Replace blades when their diameter falls below the manufacturer’s specification, typically 14.5 inches for many models. -
"How often should I replace planter parallel arms?"
Replace them when bolt holes show elongation or there’s excessive play. GBGI arms last longer, reducing replacement frequency. -
"What happens if I use worn-out planter components?"
Worn components cause inconsistent planting depth and spacing, leading to reduced yields. GBGI components are designed to fit a wide range of popular planter models, ensuring a seamless upgrade. -
"How do I align opener blades properly?"
Ensure 1.5–2 inches of contact between blades and adjust as needed to meet manufacturer specs. -
"What grease should I use for planter maintenance?"
Use high-quality, water-resistant grease designed for agricultural equipment. -
"Why is a pre-season planter field test important?"
It ensures that adjustments and repairs are effective, avoiding costly downtime during planting.
By focusing on these maintenance steps, growers can enhance planting precision and achieve better yields. With GBGI’s premium parallel arms and openers, growers can maximize yield, reduce downtime, and achieve unmatched planting precision. Prepare your planter today with confidence—because your success starts with the right tools. Click here to find a dealer near you to learn more about the GBGI’s products to start your planting season off right. Or, if you are a precision planter dealership interested in learning more about GBGI, contact GBGI today.